Ispirer Website
Ispirer Toolkit Overview
Free Trial
Ispirer SQLWays User Guide
Note: Some additional options become available after enabling Expert Mode.
This guide describes a typical database migration process using Ispirer SQLWays. It is based on a case study of migrating a Microsoft SQL Server database to PostgreSQL. For other database migrations, some options may differ depending on the selected source and target database management systems, but the setup and migration process remain the same.
Welcome Page
The first page of Ispirer SQLWays contains license information.
If your version of Ispirer Toolkit has not yet been registered or has become outdated, you will see the corresponding text in the “License Information” field (“This software is not registered”). Please go to the Registration section and follow the instructions for registering the toolkit. If your license has expired, please request a new one on the Ispirer website.
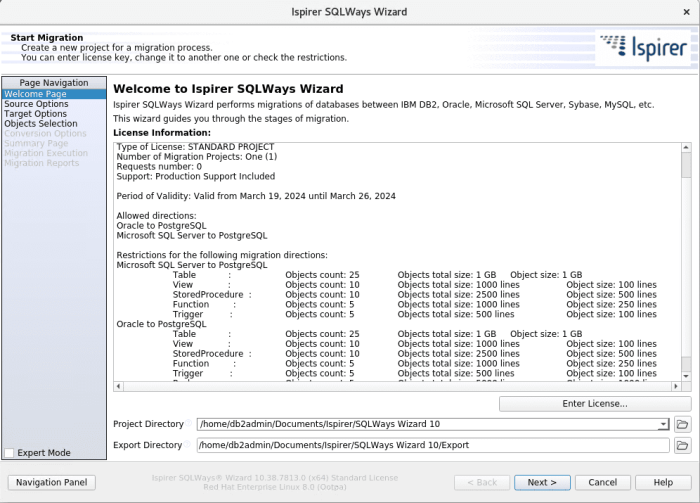
For the toolkit that has already been successfully registered with a valid license, you can specify the project directory. Ispirer SQLWays will generate a project file in this directory that will store information about the current migration process. You can also use the default project path. If you want to select ready-made migration project configurations and repeat the migration for the same set of database objects, you can select the appropriate existing project folder. In addition, you can change the configuration of your previous migration project and save it for future needs. Please note that previously used project folders may contain other files that are no longer relevant/necessary. Ispirer recommends using different project folders for different migration projects.
By clicking the “New Project” button, you can create a project with default settings, or copy settings from the selected project.

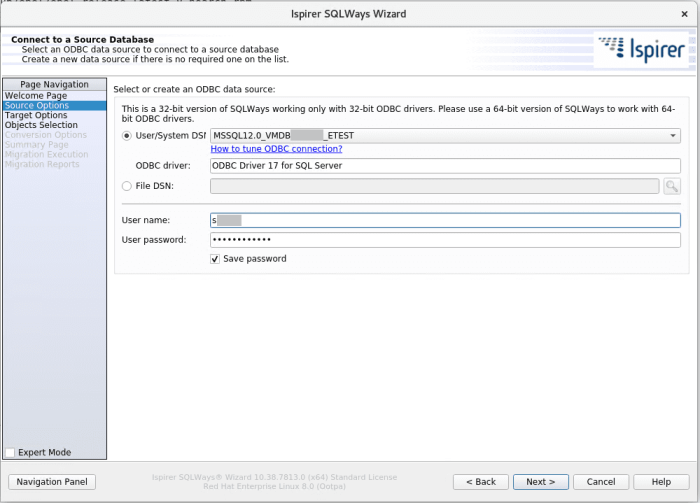
Source Options
On the second page, you need to select the source database containing the objects you want to migrate. Select or create an appropriate ODBC Data Source Name (DSN) that allows you to connect to the database that you want to migrate. You also need to specify a user and password for this connection, which will be verified after clicking the “Next >” button. To proceed to the next pages and further migration steps, the connection must be successful.
Open Database Connectivity (ODBC) is a standard application programming interface (API) for accessing database management systems (DBMS). The developers of ODBC aimed to make it independent of database systems and operating systems. ODBC is a low-level, high-performance interface designed specifically for relational data stores.
Note: SQLWays only works through an ODBC connection to the source database. This means that before using the tool, you need to install the ODBC driver and configure the ODBC connection to the source database. Some additional information about the ODBC driver installation and configuration can be found on the Database: Setup and Troubleshooting page.
Note: The user specified on this page must have sufficient rights to successfully execute SELECT statements from the source database system tables. For more information about source database user, see the Database: Setup and Troubleshooting page.
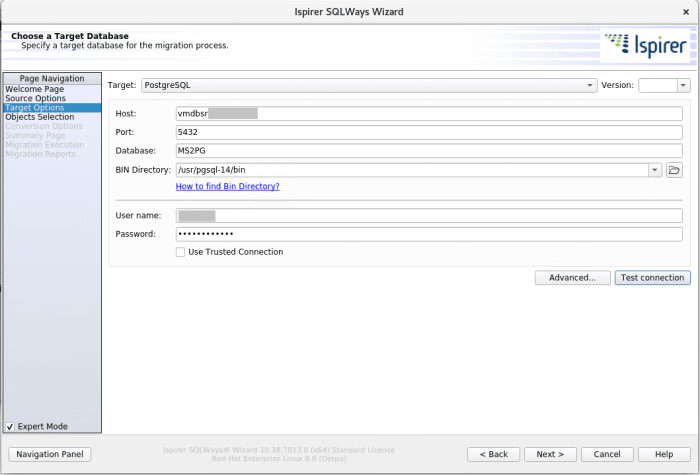
Target Options
On the third page, you need to fill in the fields identifying the target database: its DBMS, server and name of the database itself, as well as user and password. This information will be used by SQLWays to generate the correct commands for the target database native utilities.
Note: The specified target database and its schemas must already exist and be accessible when the import operations are performed. This tool does not create the target database. The target database is populated with the newly converted objects.
You also need to specify the path to the Bin Directory here. This is the folder where the target database native utilities are stored on your computer where Ispirer Toolkit is installed. This means that in order to perform an import into the target database, you need to have a native utility installed on the computer where you are running the conversion.
Objects Selection
In this step, you need to specify the objects to convert by selecting them from the tree of objects extracted from the source database. To select objects for migration, you can drag them from the left panel to the right (and vice versa) or do this using the buttons at the bottom of the page. Once all the required objects are in the target tree, click “Next >”.
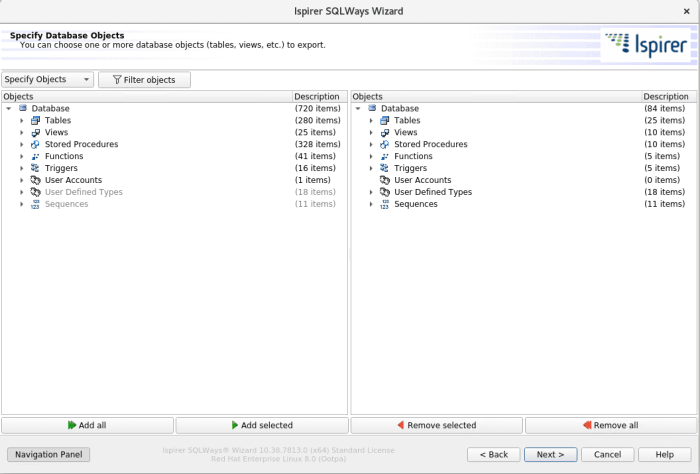
Note: In SQLWays, you can go back and change the object selection for migration and other parameters later until the conversion project is launched on the Migration Execution page.
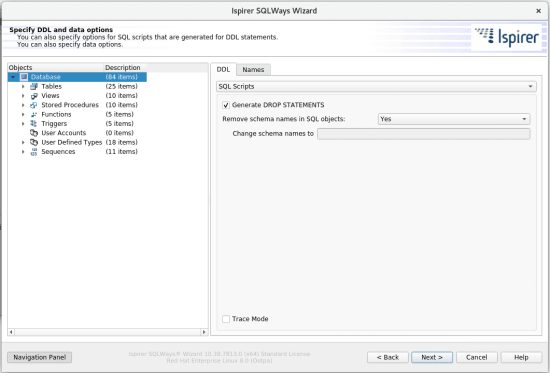
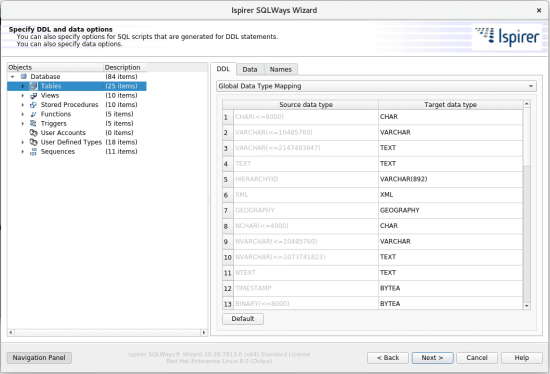
Conversion Options
On the Conversion Options page, you can change the DDL and Data options. You can specify various parameters that can be used to customize the conversion process. In the object tree, elements (database objects) of different levels and types have different available options (for example, mapping data types and column names, formats, files, schemas and various types of database objects, etc.).
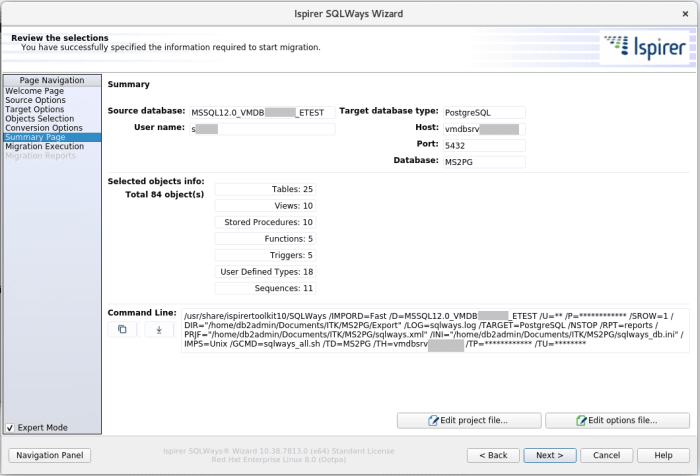
Summary Page
On this page you can view the selected configuration. If you want to change something, you can go back and do it using the page navigation panel or the “< Back” button. An example of what this page looks like is shown below.
Migration Execution
Once the configuration is complete, you can start the migration. The toolkit migration process consists of 2 stages: conversion and import. At the conversion stage, the tool extracts information about the objects selected for the migration, converts them and generates the appropriate set of files. At the import stage, the tool creates all the converted objects and data in the target database.
To start the conversion process, click the “Start Conversion” button. Information about the conversion output is dynamically displayed in the “Conversion output” text field. After the conversion process is complete, you can run the import process to create the converted objects in the target database by clicking the “Start Import” button. If you want to view information about the import output, switch to the “Import output” tab.
By clicking the “Import Options Button”, you can check the “Start Import Automatically” checkbox before running the conversion, if you see that it may take much time due to the large number of objects and their complexity, and you are not going to monitor the entire conversion phase.
Once the conversion or conversion and import is complete, you can open the object for editing directly in the tool by clicking the “Edit” icon. The converted code will appear in a new tab of the tool and you will be able to edit it and save the changes. After editing all the necessary objects, you can import them again.

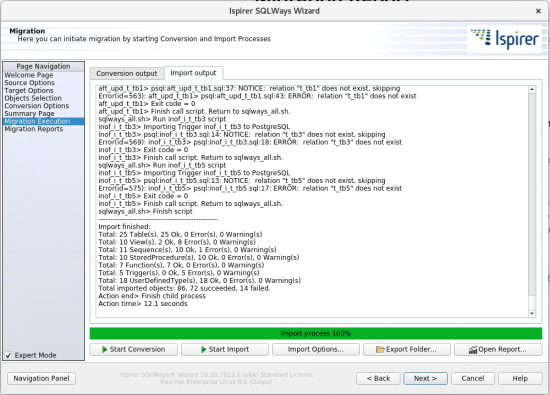
You can view all the generated files in the export directory by clicking the “Export Folder…” button. This button will open a folder with all conversion results along with the log files: sqlways.log and sqlways_imp.log. The sqlways.log file stores detailed information about the conversion stage, and the sqlways_imp.log file stores information about the import stage. These log files can help the Ispirer support team understand the causes of problems you may encounter during migration if you provide appropriate feedback.
Additionally, you can view the migration report by clicking the “Open Report…” button.
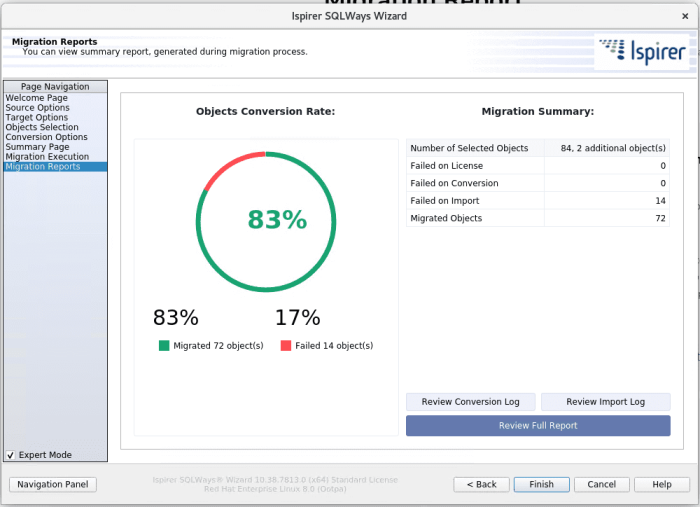
Migration Reports
On the last page of Ispirer SQLWays, you can view reports containing general information about the migration process:
- Export/import information;
- Information about each object and a list of all errors that occurred during the migration process;
- Recommendations for troubleshooting and contact information for support in case of other technical issues.
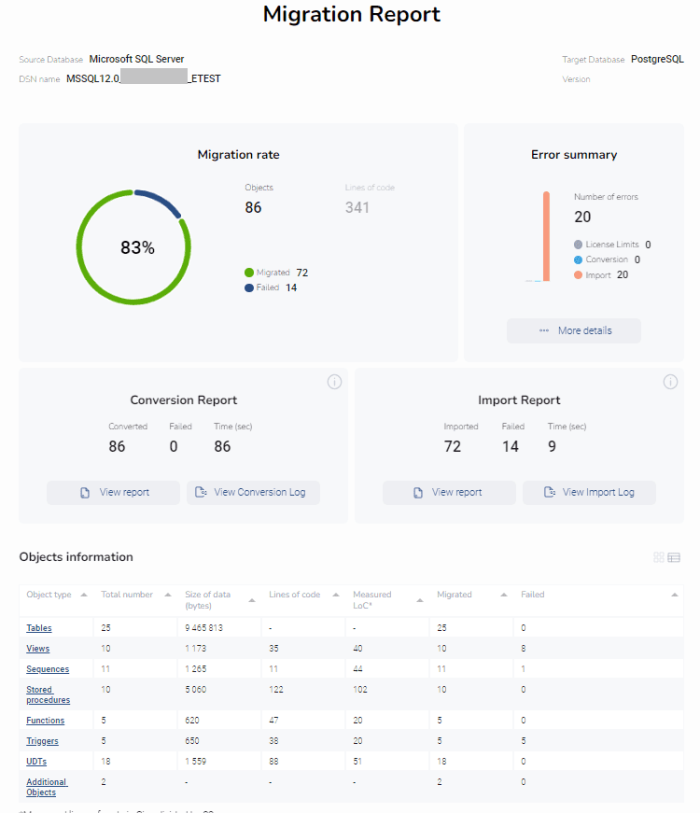
The contents of the full migration report are as follows:
After clicking the “Finish” button, the migration configuration will be saved for future launches and Ispirer SQLWays will be closed.
Other Questions
If you have additional questions or encounter any difficulties, please contact our support team: support@ispirer.com