Ispirer Website
Ispirer Toolkit Overview
Free Trial
Ispirer InsightWays User Guide
Welcome Page
On the Welcome page, you should specify the project directory where the sqlways.log file with the log of the assessment process and reports will be saved. By default the project directory is /Documents/Ispirer/Ispirer InsightWays 10/.
If you want to change the project directory, make sure that you have access to it. In other cases, we can't guarantee that the reports will be saved properly.

Source Options
Analysis of Database Objects
If you need to analyze objects located in a database, select the “Database” option. Then, you will need to specify the ODBC connection to the source database, as well as enter the username and password to connect.

NOTE: Our tool only works using an ODBC connection to the source database! This means that before running Ispirer InsightWays, you need to install the ODBC driver and set up the ODBC connection to the database that is to be analyzed by the tool. For more information about source database user privileges, see the appropriate section for your source database.
NOTE: The user specified on this page must have appropriate rights to select system tables from the source database. For more information about source database user privileges, see the appropriate section for your source database.
Users can now simply select an ODBC driver installed on their machine and provide the necessary database connection details. Our tool will then automatically establish the required connection, eliminating the need for users to configure it manually.

NOTE: This feature is currently supported only for SQL Server and Oracle source databases.
Analysis of Scripts
If you need to analyze SQL scripts or application code containing Embedded SQL, select the “Scripts” option. Then choose one of the two available options: SQL Scripts or ESQL in Application.
Next, specify the source technology. For SQL scripts, you must indicate the source database and its version.

For ESQL in Application, you need to specify the source application, the database, and their versions.
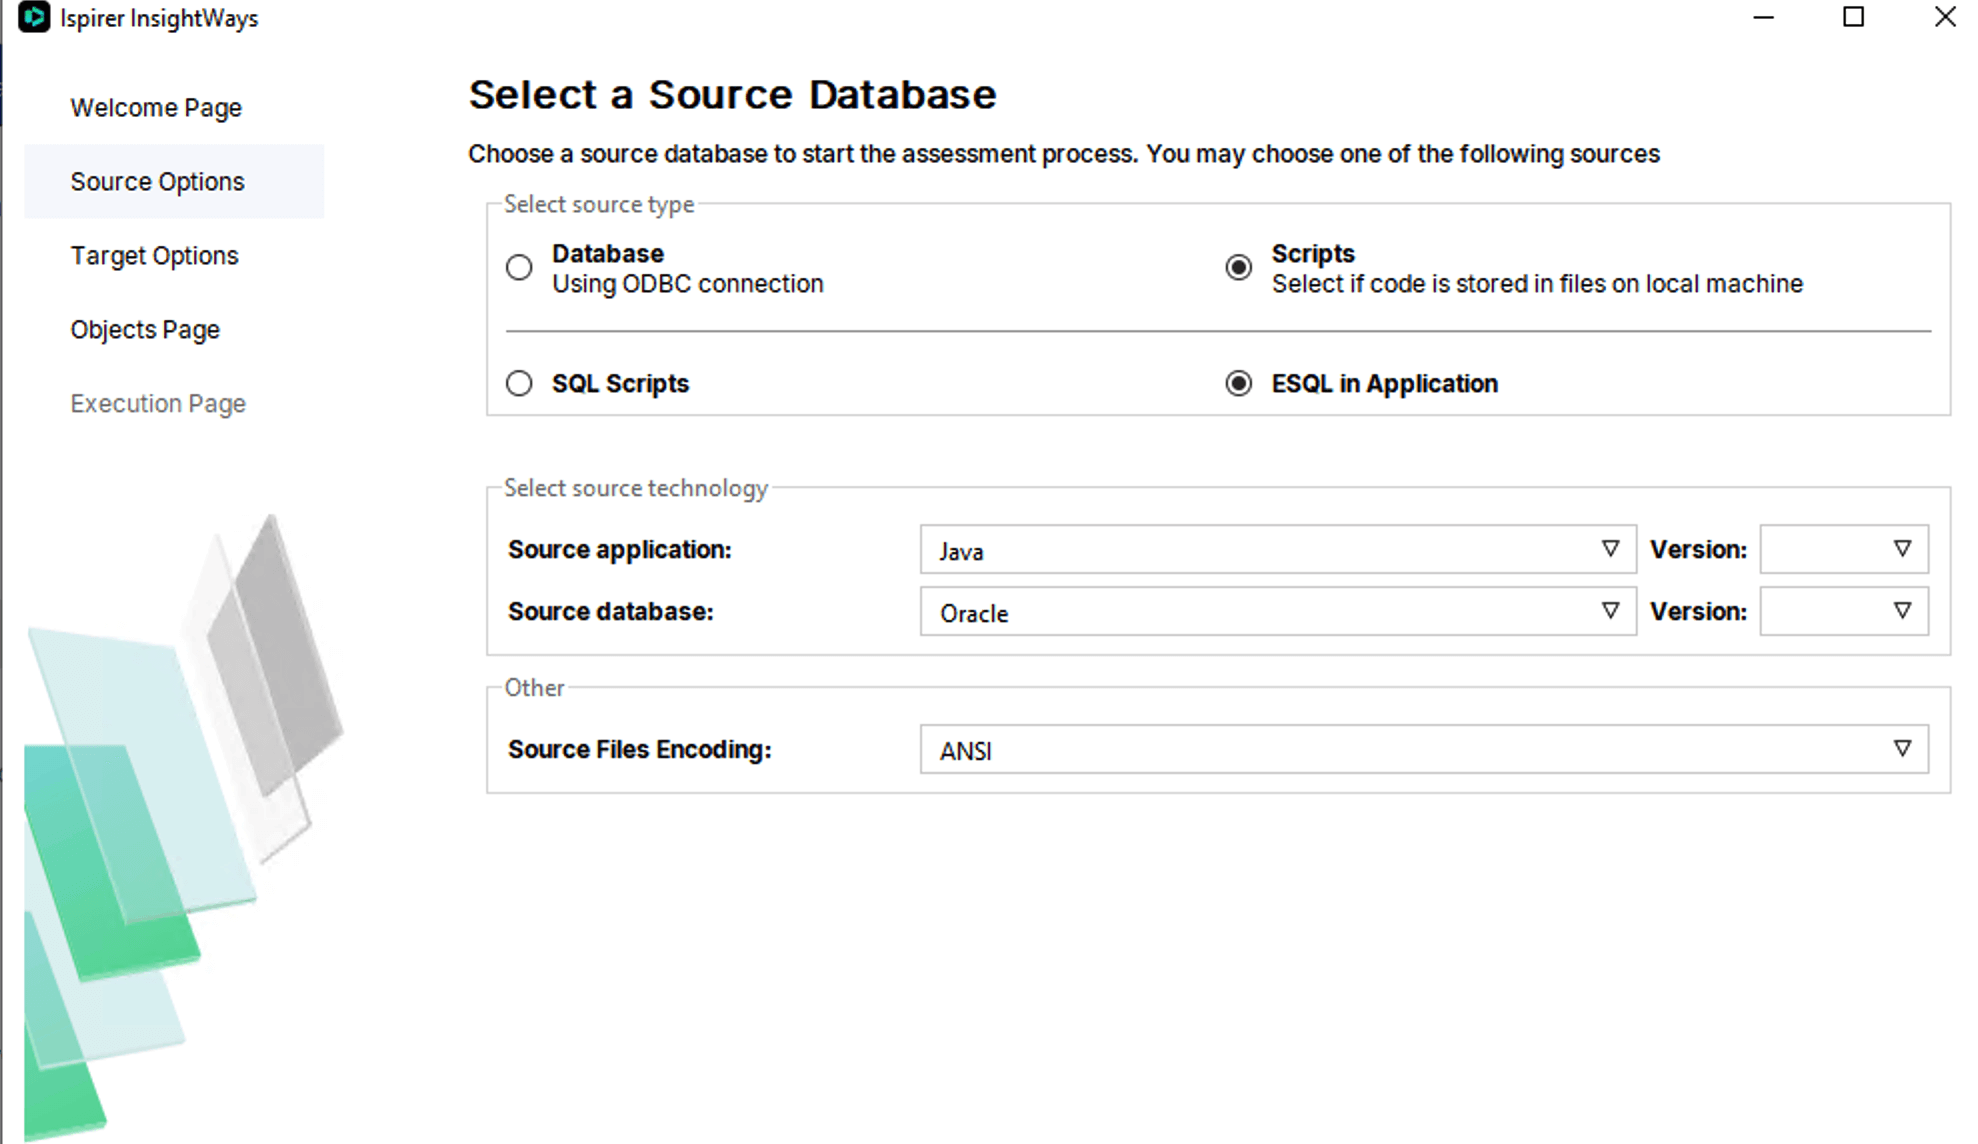
NOTE: Currently, InsightWays supports analysis of Embedded SQL in Java and C#.
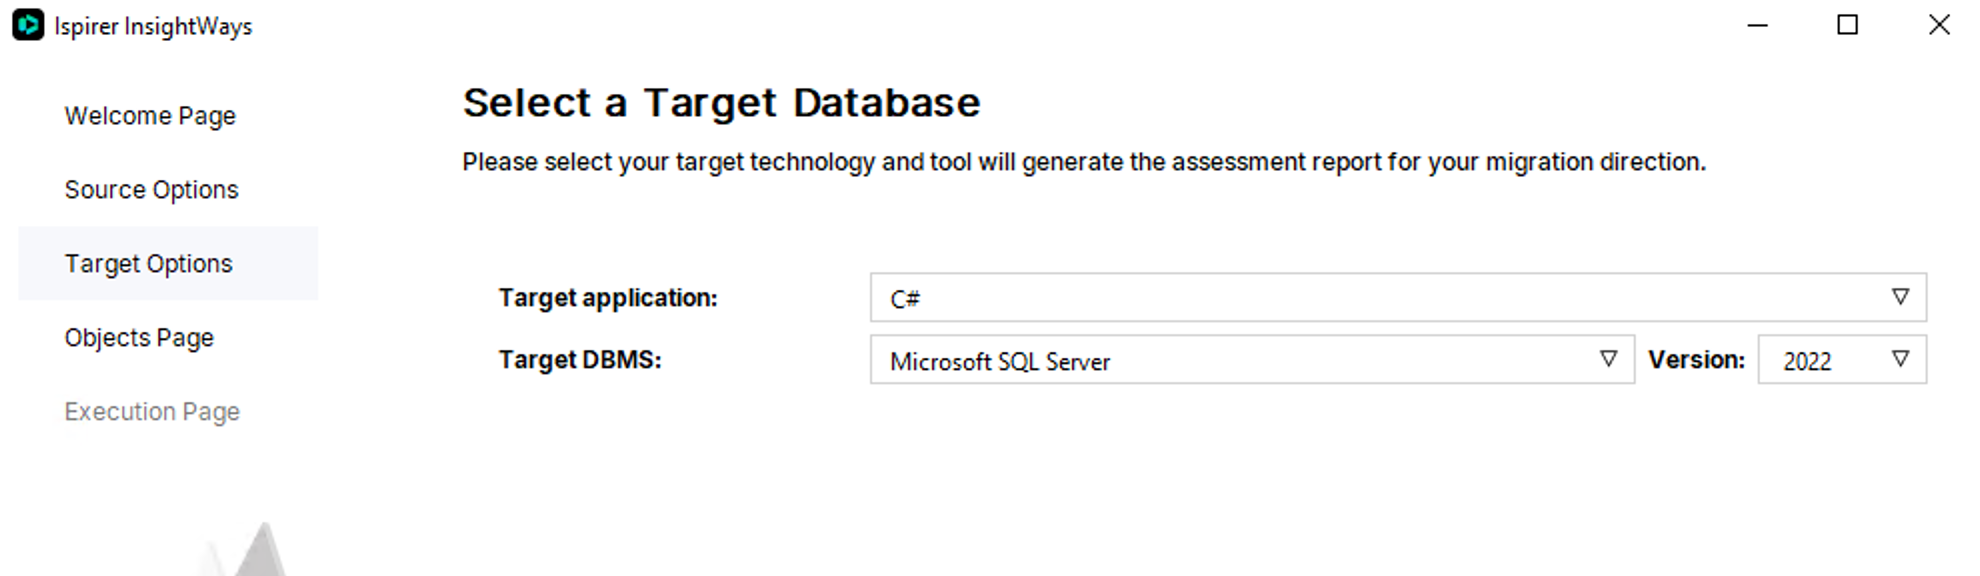
Target Options
When analyzing database objects or SQL scripts, you must specify:
- Target Technology — the target DBMS in your project.
- Version — the version of the target database.

When analyzing ESQL in an application, please specify the target application, target DBMS, and its version.
Objects Page
If you are analyzing database objects, use the arrow buttons or simply drag & drop objects from the left pane to the right. You can move a single object, an entire schema, a specific object type, or your entire database.

If you are analyzing scripts, use the arrow buttons or simply drag & drop files from the left pane to the right.

NOTE: The remaining configuration steps for InsightWays are the same for both database objects and scripts.
Also, here you need to enter the size of the database data manually.
Execution Page
On the “Execution” page you can check how assessment process is being performed. The tool depicts each object while collecting the metrics and provides total statistics at the end of the log. The same information can be found in sqlways.log file in the project directory.

After completing the analysis, users can now view the following information:
- Conversion rate of the analyzed code;
- Potential conversion rate after applying customizations;
- Details about failed objects;
- Measured lines of code;
- Total number of code constructions.
Please send the entire “Reports” folder to our business managers for analysis.
Default project directory: /Documents/Ispirer/Ispirer InsightWays 10/
Alternatively, if sending the entire folder is inconvenient, you can locate the “data.js” file within the “Reports” folder and send us only this file. The “data.js” file contains all the necessary information we need for analysis.
Other Questions
These steps describe how to generate assessment reports for the source database using the InsightWays tool. If you have any additional questions or face any difficulties please contact our support team: support@ispirer.com